


I am sure at some point in life you must have had used VLC media player, ever wondered who works on VLC? They are all developers like us who work day and night without any monetary benefits to provide us such amazing software. VLC is an Open source software which means the source code of VLC is openly available for anyone to inspect, modify and learn from. For me, open source has always been the biggest learning medium. Whenever I read someone else's code there is so much to learn from. You must be like, "Okay, Aman I understand Open source is good and all but what the heck is hacktoberfest?"
What is a Hacktoberfest?
As the official site of hacktoberfest says "Hacktoberfest is a monthlong celebration of open source software run by DigitalOcean. Hacktoberfest is open to everyone in our global community! Four quality pull requests must be submitted to public GitHub repositories. You can sign up anytime between October 1 and October 31."
In this post, I will introduce you to git which is the basis of all open source contributions and hopefully, by the end of this, you will also be able to make your first open-source contribution.
Introduction to GIT.
Why do we need GIT?
Whenever we are working on a large project and we are collaborating with multiple developers, we need some way to share our code and keep a 'backup' of daily work/versions, etc. Here comes something called VCS or version control system. A VSC is used to record changes to our code through Repositories. GIT is a and example of VCS.
Basics of GIT.
3 Areas of GIT: So whenever you are working with a git related project you need to understand that there are 3 areas that your changes have to go through in order to get saved to git.
- Working area: This is the first stage where you are directly working. All the changes you make are here.
- Staging area: This is like a draft area. In this area your code is not permanently saved, You are just saying "Hey GIT, I think this is a good change in my code and I may save it...can you add it to the
stagingarea?" and git will add this to the staging area. [Read More] - Commit area: This is the place where your changes are permanently saved.
So if you are comfortable with these three areas, we should go ahead with initializing git. Shall we? 😃 This is going to be a hands-on blog so just follow as I am saying and I am sure by the end of this you will be able to make your first PR. 😎
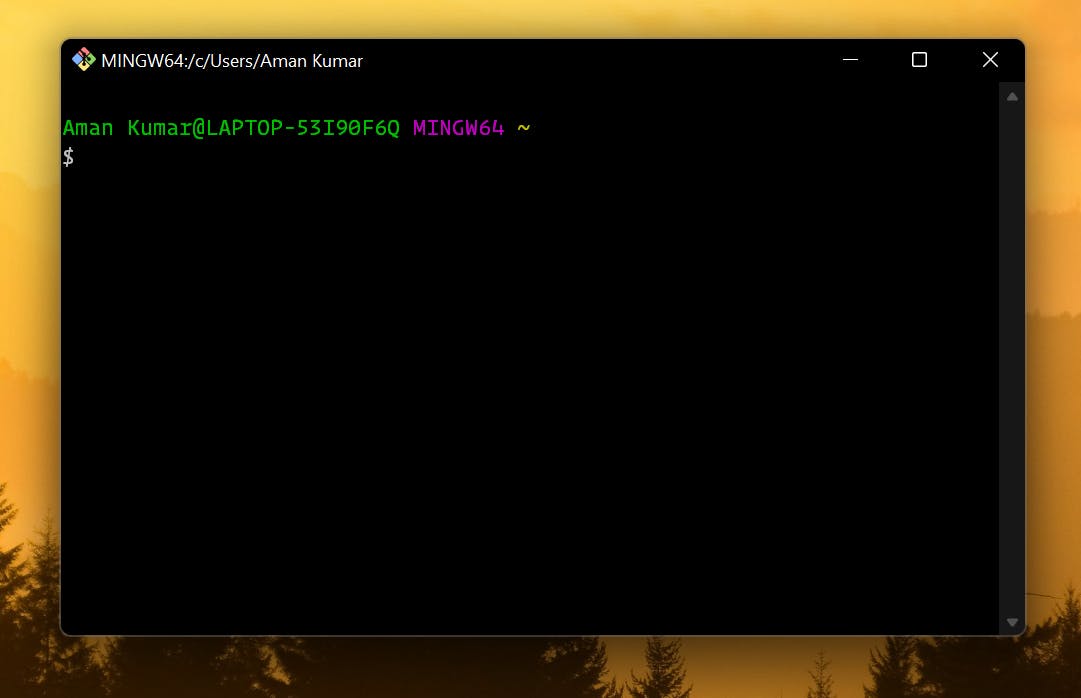
So first things first. Let's install git and configure it. You can visit this link to download and install git on your system. Let's configure it. I am using git-bash in this tutorial you can use terminals like cmd, powershell. This is how git-bash looks right now.
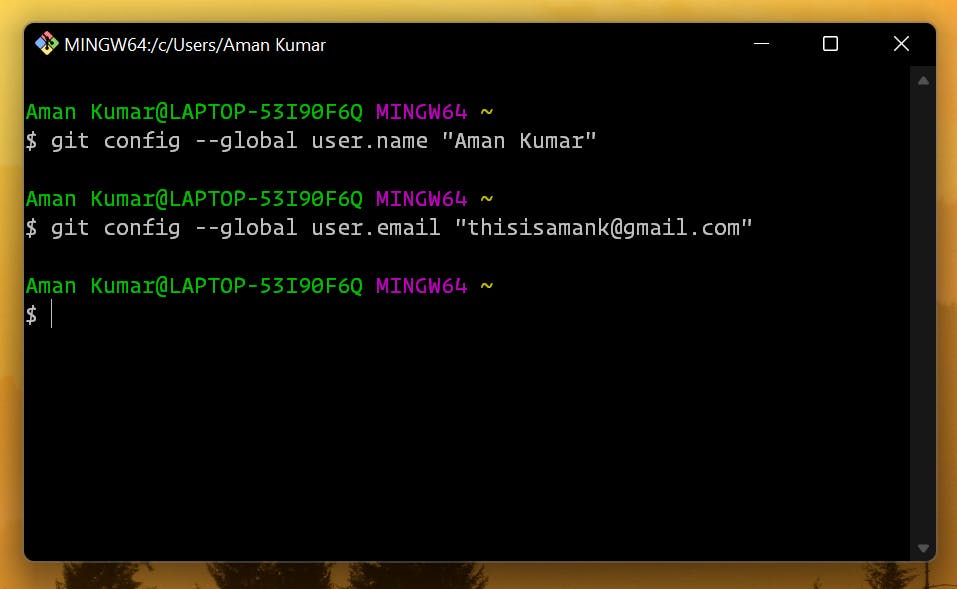
Once git-bash is opened, you have to set up the user's name and user's email for setting up user's name use this command: git config --global user.name <Your name>
TIP: Don't forget to use " " if your name has space.
for setting up user's emai use this command: git config --global user.email <Your email>
This is how these commands will look in total.
Initializing project 🤩
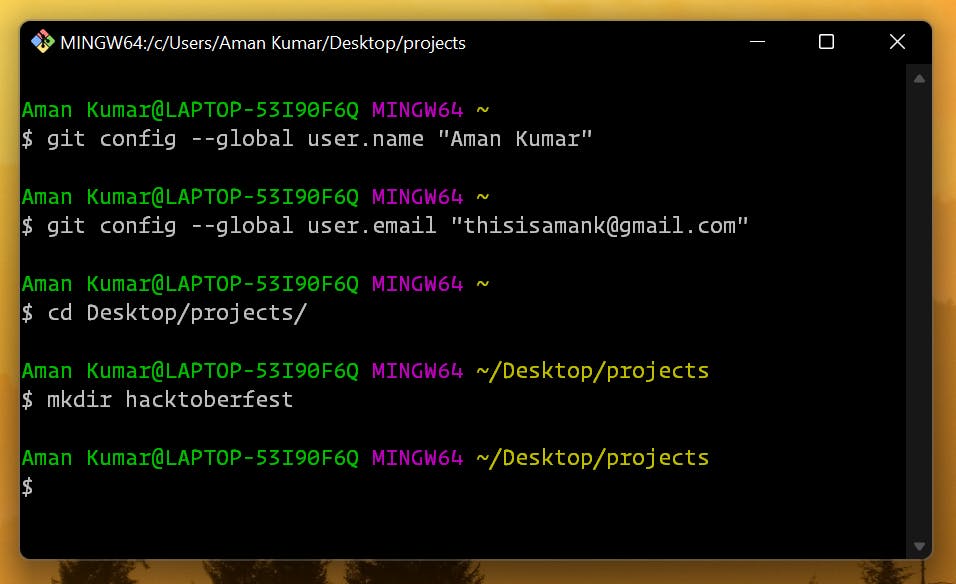
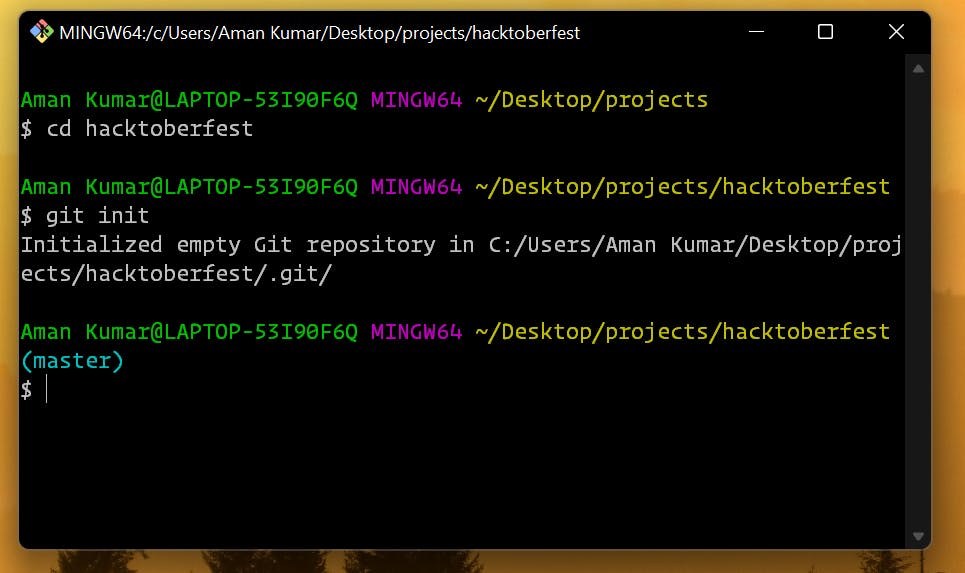
Now let's create a folder where we will work for this we can use mkdir command. You can also manually create a folder too. I went to projects folder on my desktop and created a hacktoberfest folder. Overall this looks like this now.
Now we will navigate to hacktoberfest folder and initialize git there. Why initialize ? Okay, so whenever we work with git we initialize it first to tell git that we want to use your features here.
First Changes ✅
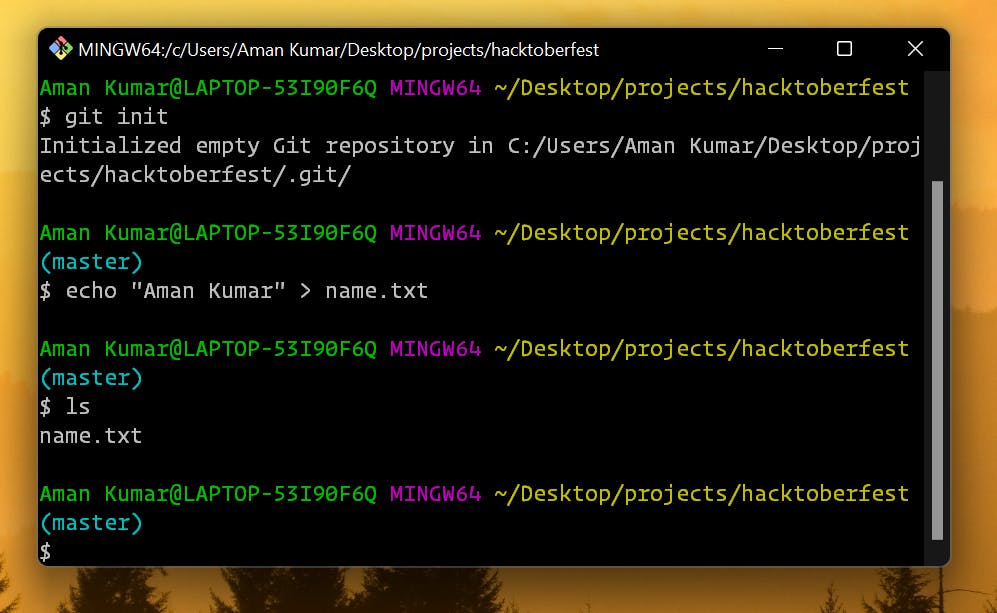
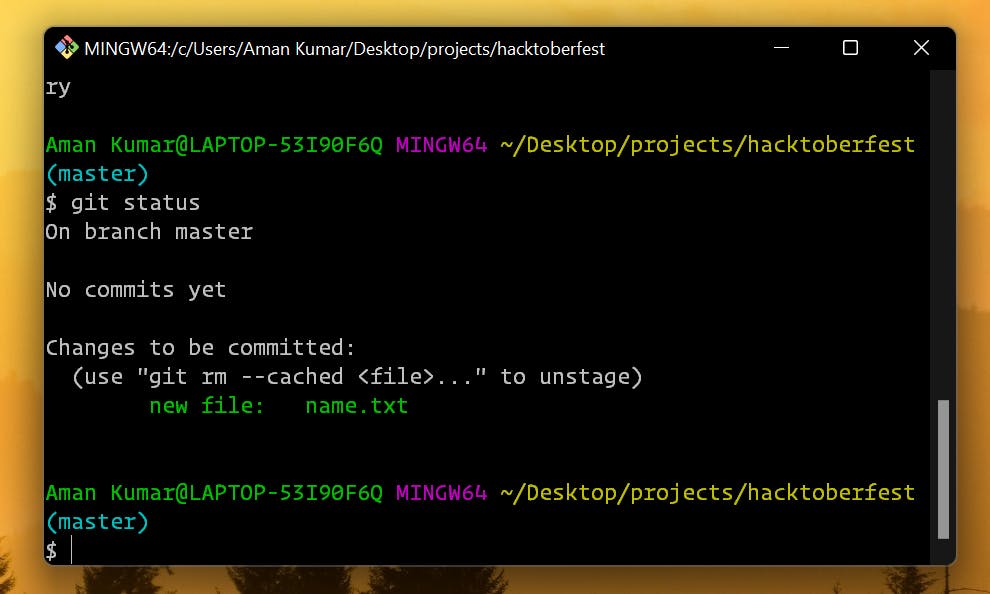
Now this project is a git initialized project. Let's create a text file with our name in it.
echo is a standard unix command which displays the "String" passed to it. So here we are saying it to echo our name to name.txt file by using > this operator.
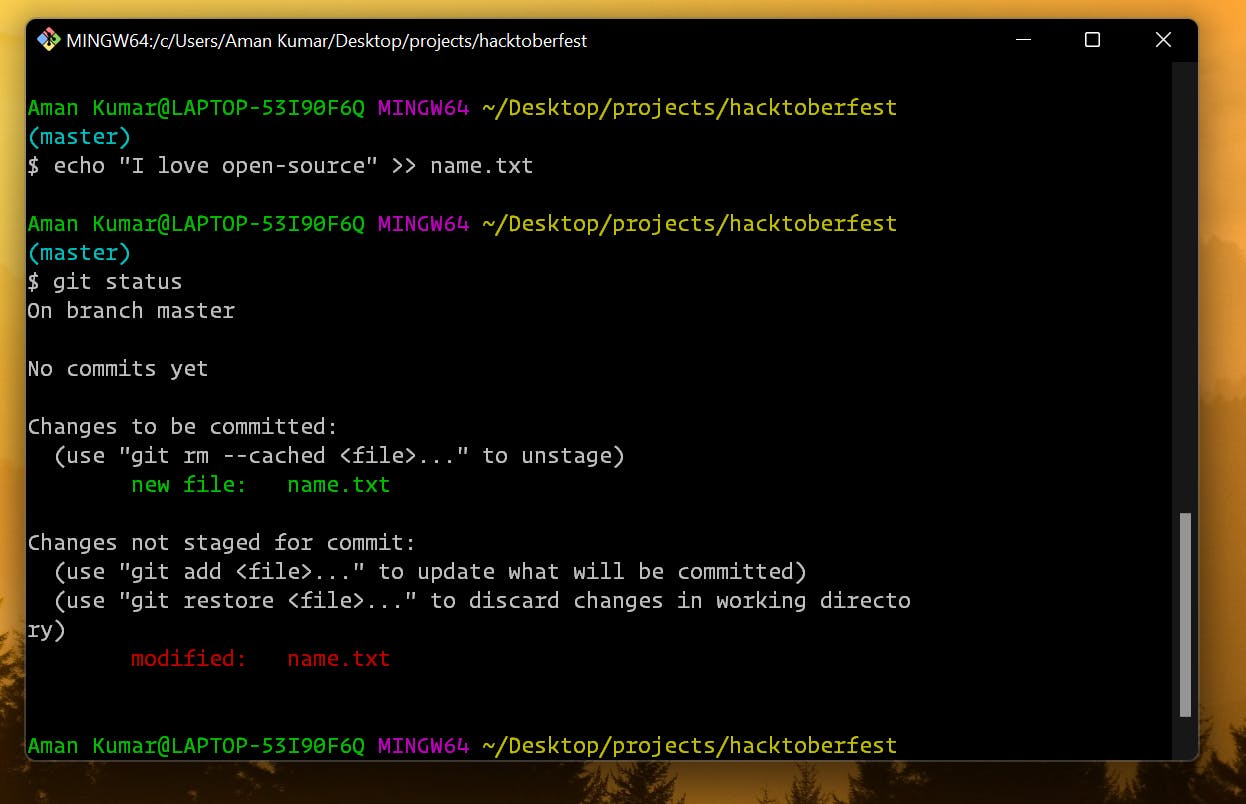
TIP: If you want to further add someone else's name too you can use >> operator to append new values to name.txt file.
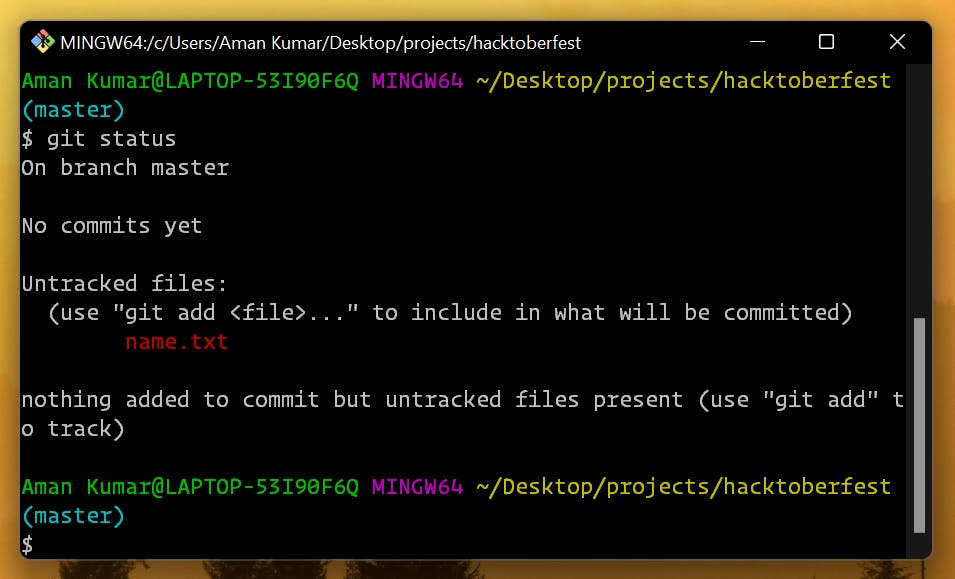
Remember, I told you about the staging area? Right now whatever you have written is in the working area and we need to add it to the staging area now. But how do I know? 🤔 So there is a command exactly for this, The command is git status check this out now.
okay okay okay, I know there is a lot of jargon here. Let me break it for you. Shall I?
so the first line tells us that right now we are on master branch. But what is a branch? I will tell you more about this soon, for now just think of it as a branch of a code-tree where people can write code.
The major thing to focus on here is the text written in red. name.txt git is saying to us, "Hey, you have some changes in your working directory which I have no idea about. You can let me know if you want me to track it by adding it to the staging area. Use git add <file name> to track it.
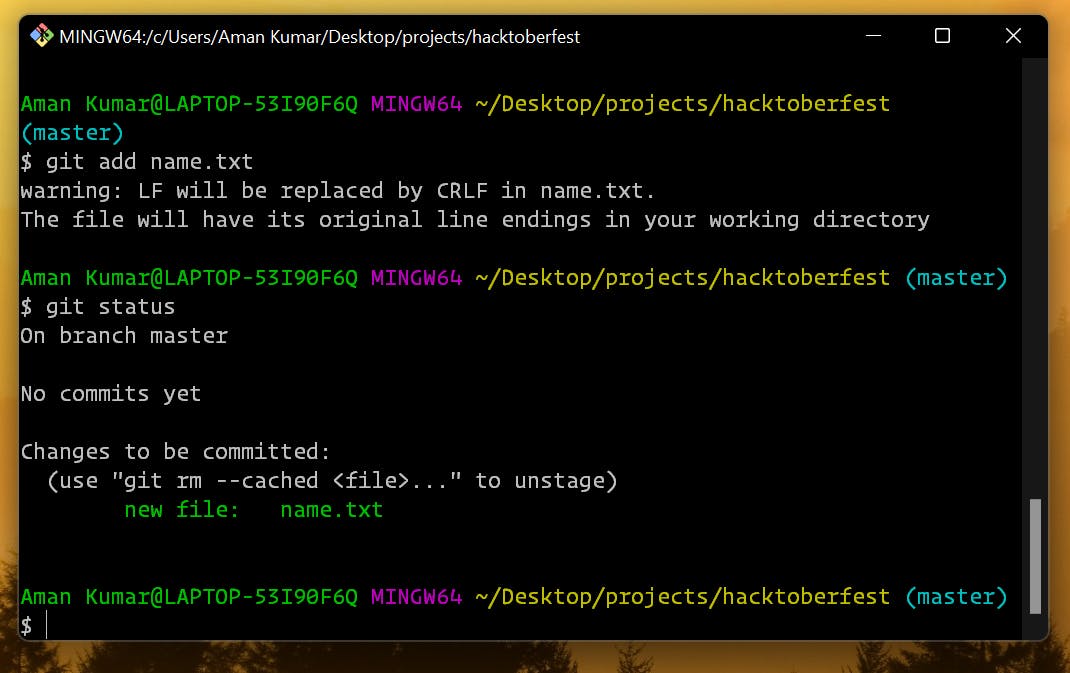
Okay, so we should hear what git is saying, and let's add it to the staging area?
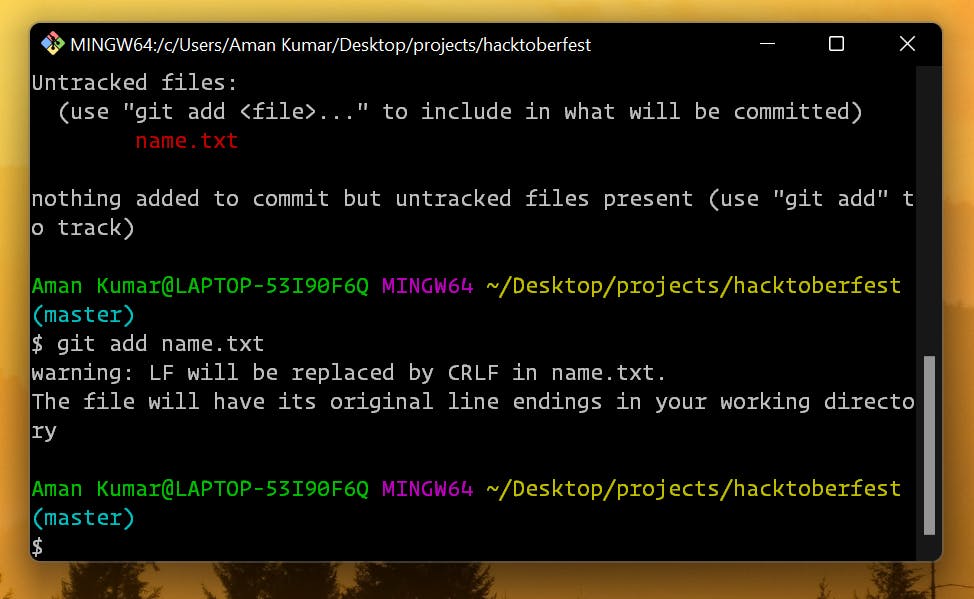
We have now added name.txt to the staging area. You can see how the red text is converted to green because now git is tracking this file.
What if we change the name.txt file? 🤔 Let's add something else to our file and see what happens.
First commit 🔥
Interesting, git knows that we have modified this file and it is again yelling at us for not adding it to the staging area. Let's add it and then make our first commit.
Now git has stopped yelling at us. 😁 It's time for us to make our first commit. But what is a commit, Aman? Remember I told you about 3rd area of git the area where things get permanently saved? I am talking about that.
To commit changes we use git commit -m "<meaningful commit message>"
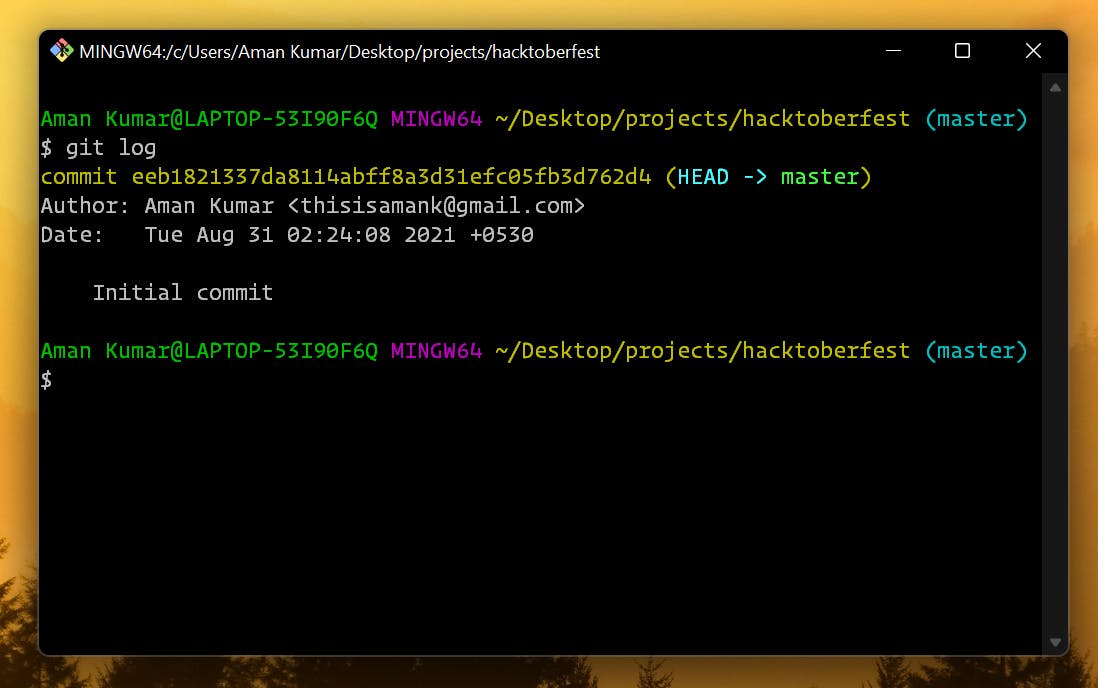
Let's do it!
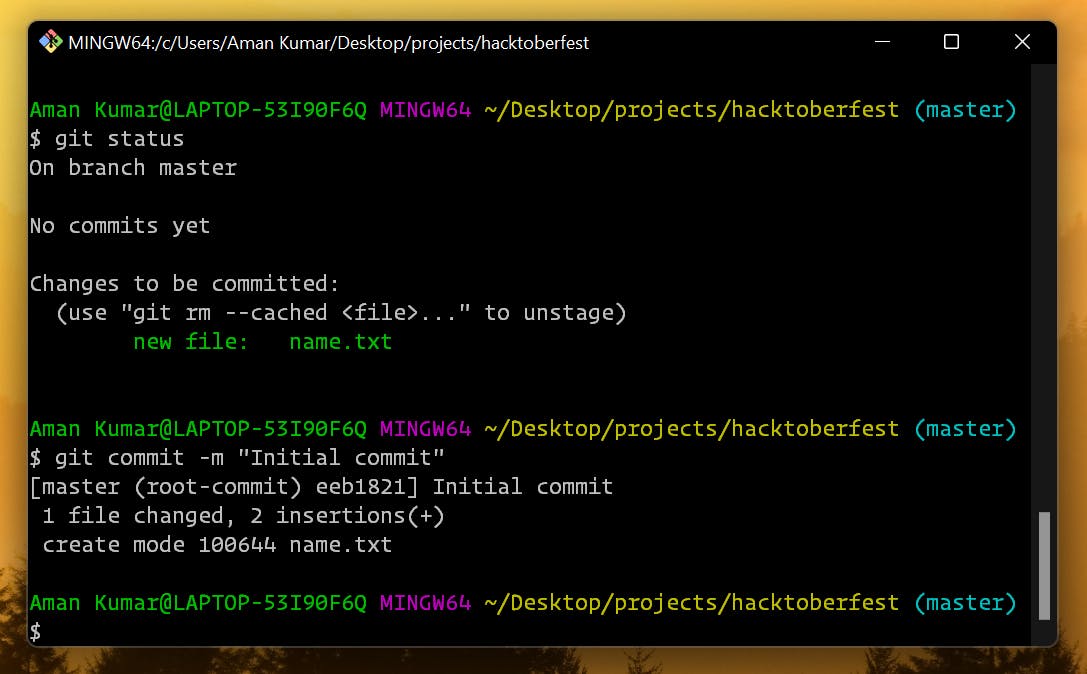
this is how it looks when you commit changes. When you are working on a large project often you will need to see commit history. To see commit history you can use git log command. Let's see this in action.
Branching 🌿
Now let's say you have to make some more changes but you are afraid that your changes might not be right. So how do you deal with it?
We make branch for these changes and commit these changes to this branch. Once this branch is reviewed by other developers it is merged to the main branch. Let's create a new branch now.To create a new branch we use git branch <branch name> command. Once the branch is created we have to switch to newly created branch for that we use git checkout <branch name>.
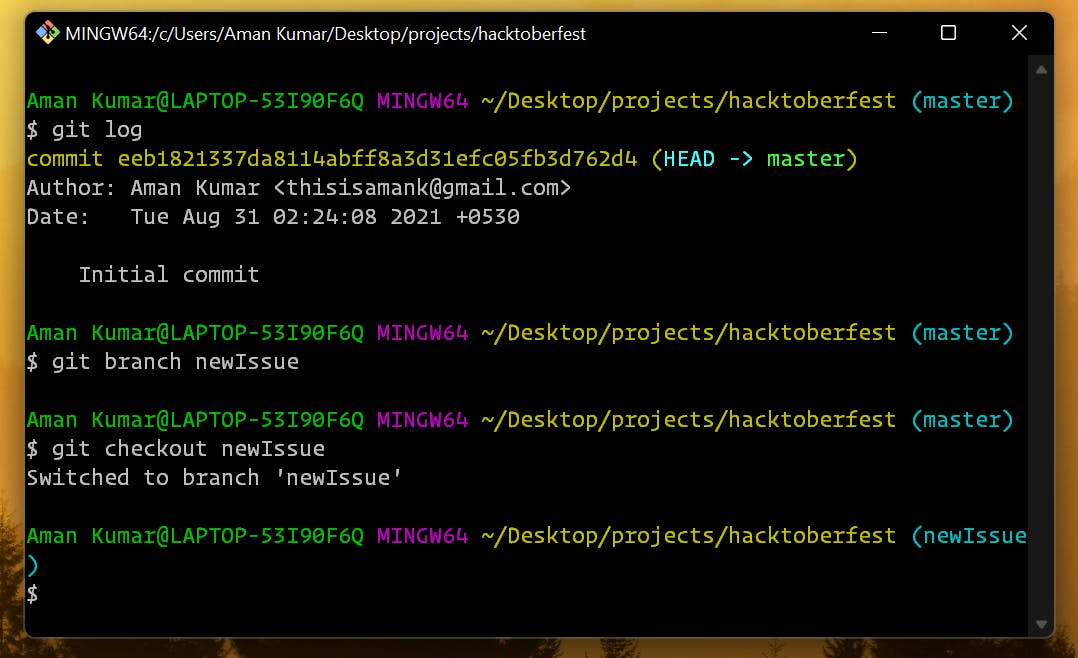
TIP: to create a new branch and switch to the new branch you can use git checkout -b <branch name> to do it in a single line.
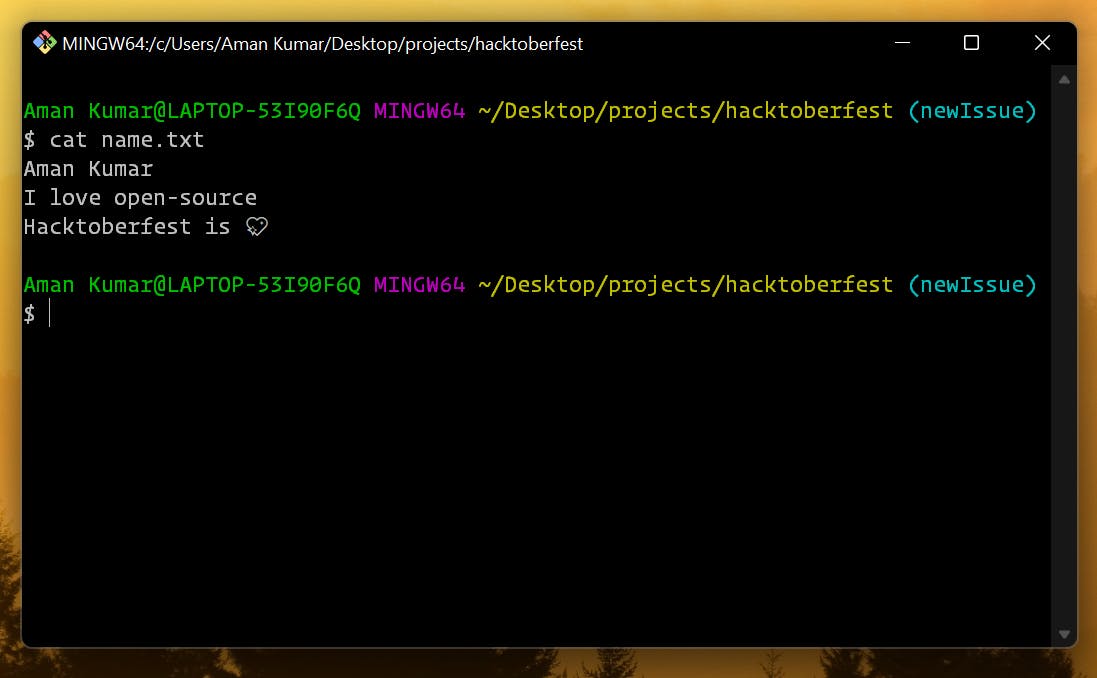
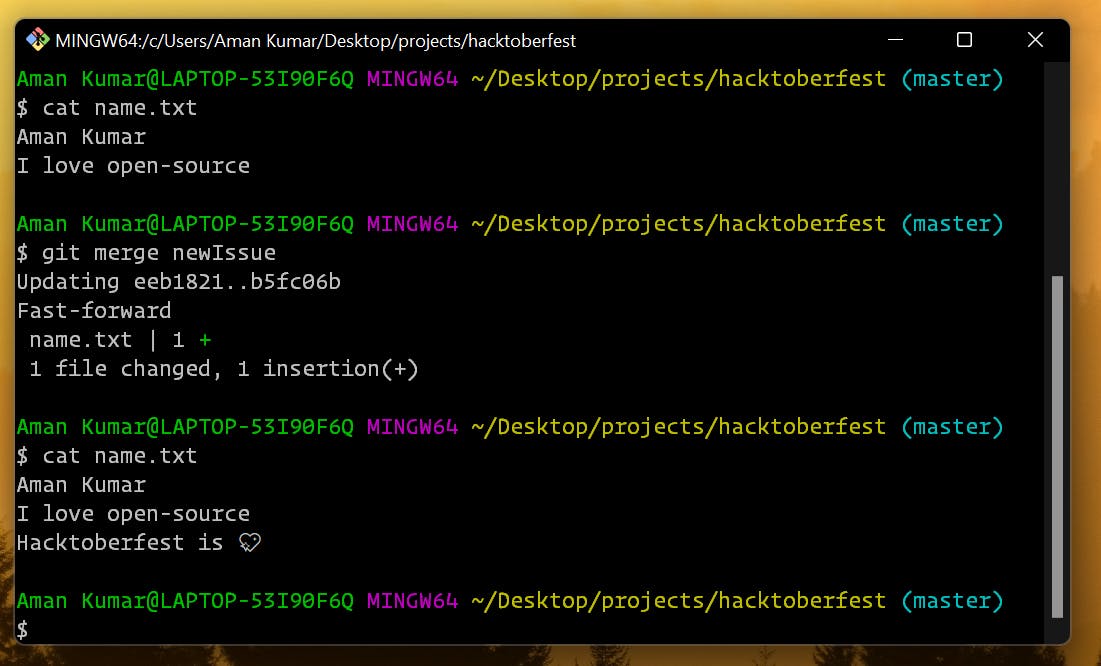
now I will make changes to name.txt file on this branch and add Hacktoberfest is 💖 and commit changes to newIssue branch.
Let's see what file has in newIssue branch.
Right now this file has these contents. Let's switch back to master branch and see what is there. For switching to master branch, we can use git checkout master command.
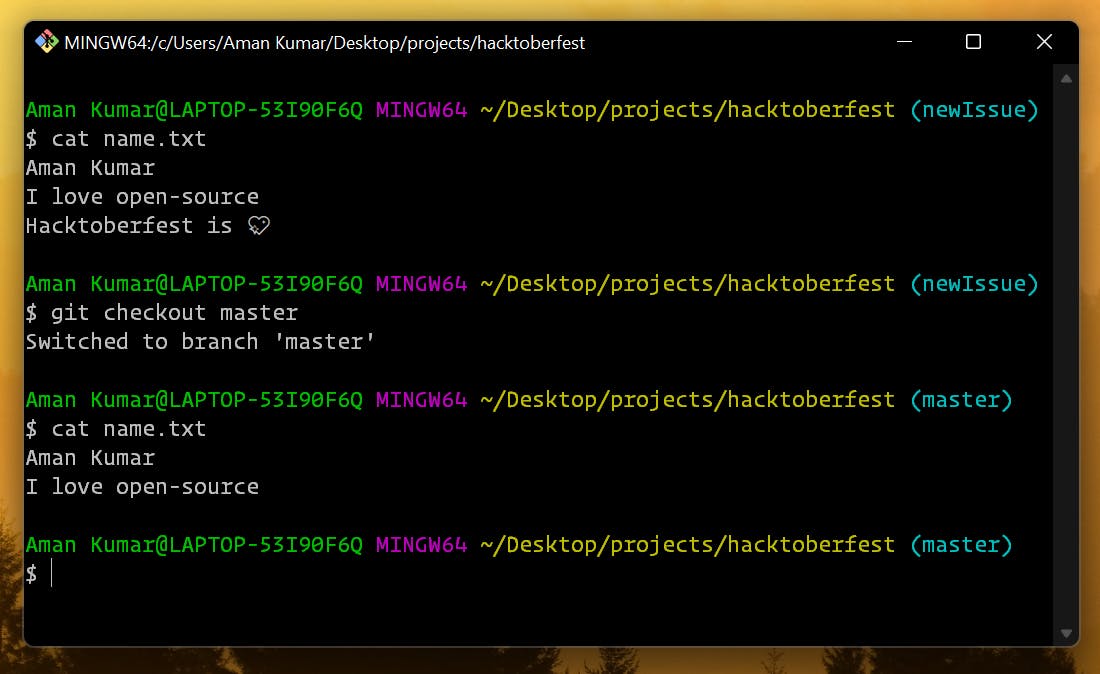
You can now clearly see, that changes made in newIssue branch are limited to that branch and no changes are reflected in other branches. But how do we add these changes to the master branch? 🤔 We have a command exactly for this. We can use git merge <Branch Name> command for this.
Raising the first PR 🎉
So now we have enough of groundwork done now let's create the first PR. To do this we have to select the project first. For example I am selecting a very easy issue on this repositoy by Vinit Shahdeo, He is a Software engineer II at Postman and a github star from India. (https://vinitshahdeo.dev/).
We will try to find an easy issue first. We can go through issues in the repository. Once we have found the issue we are interested in working we can discuss about the issue with the project maintainer and ask him to assign the issue if possible.

once we have selected the issue we want to work on we need to fork the repository. To fork a repository click on fork button on the top-right side.
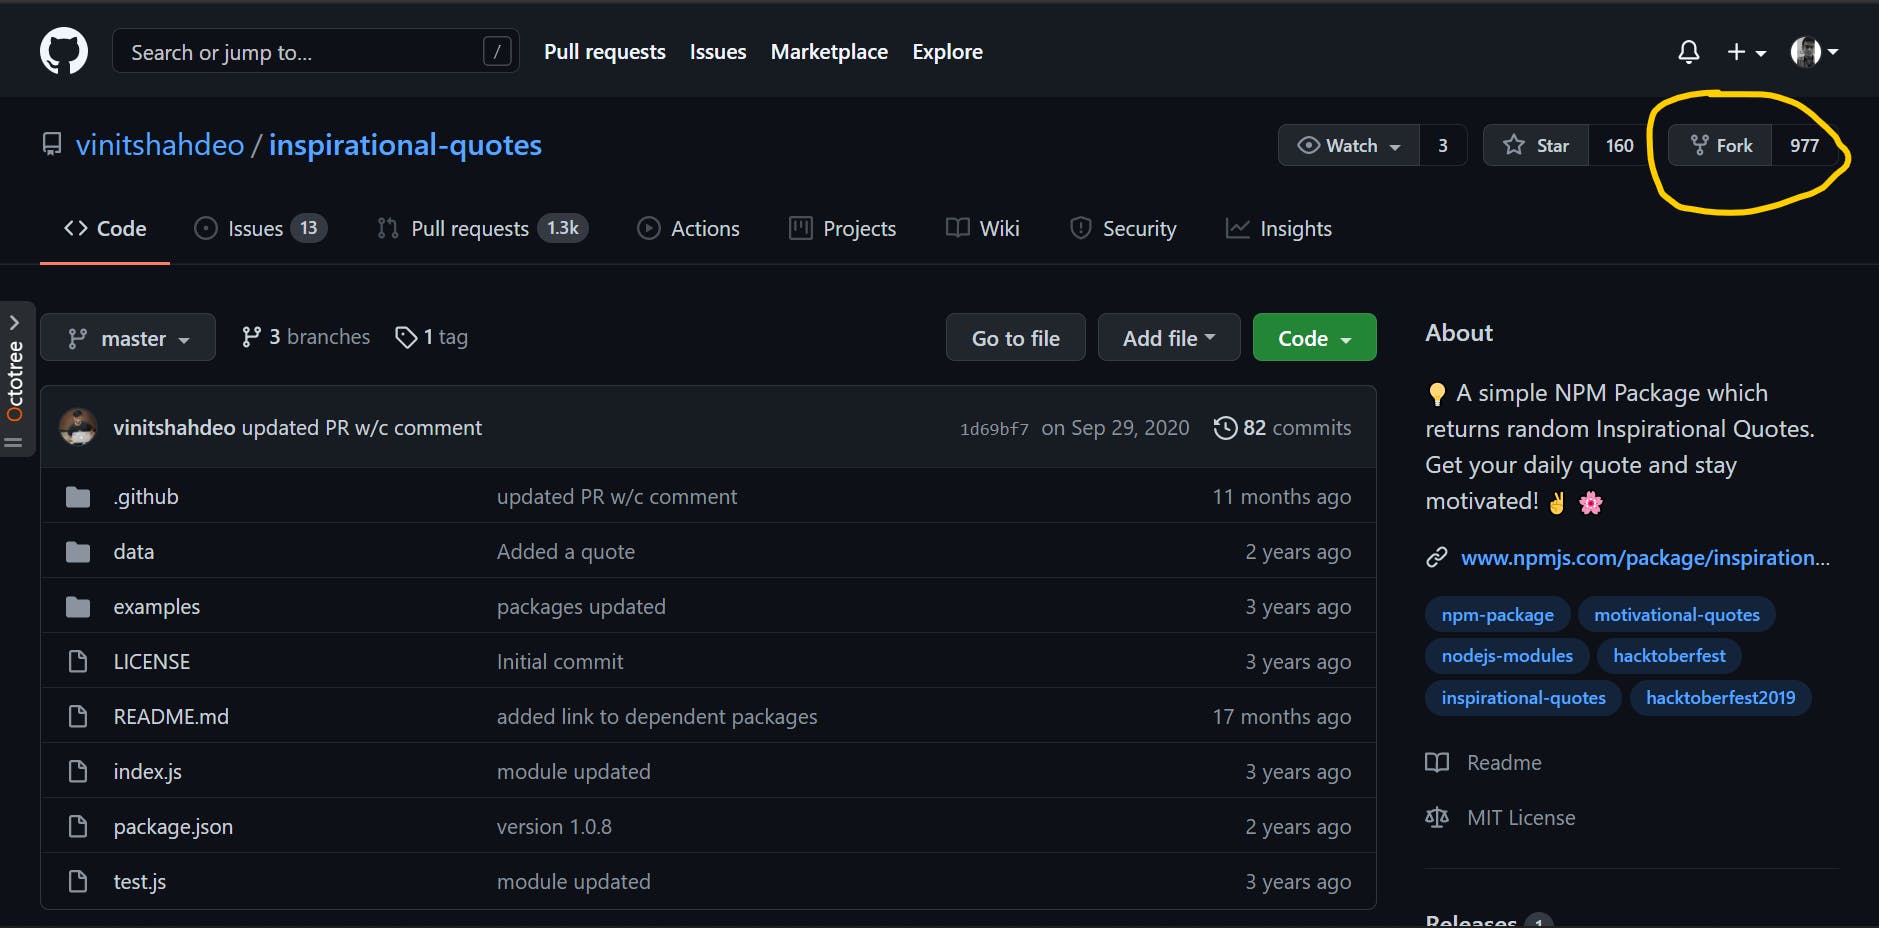
Whenever we fork a repository we get a clone of this repository in our account. We can make any changes to this repository. To work on issue we have to now clone the project in our local system. To clone the project we can use git clone <project url>. So let's do this.
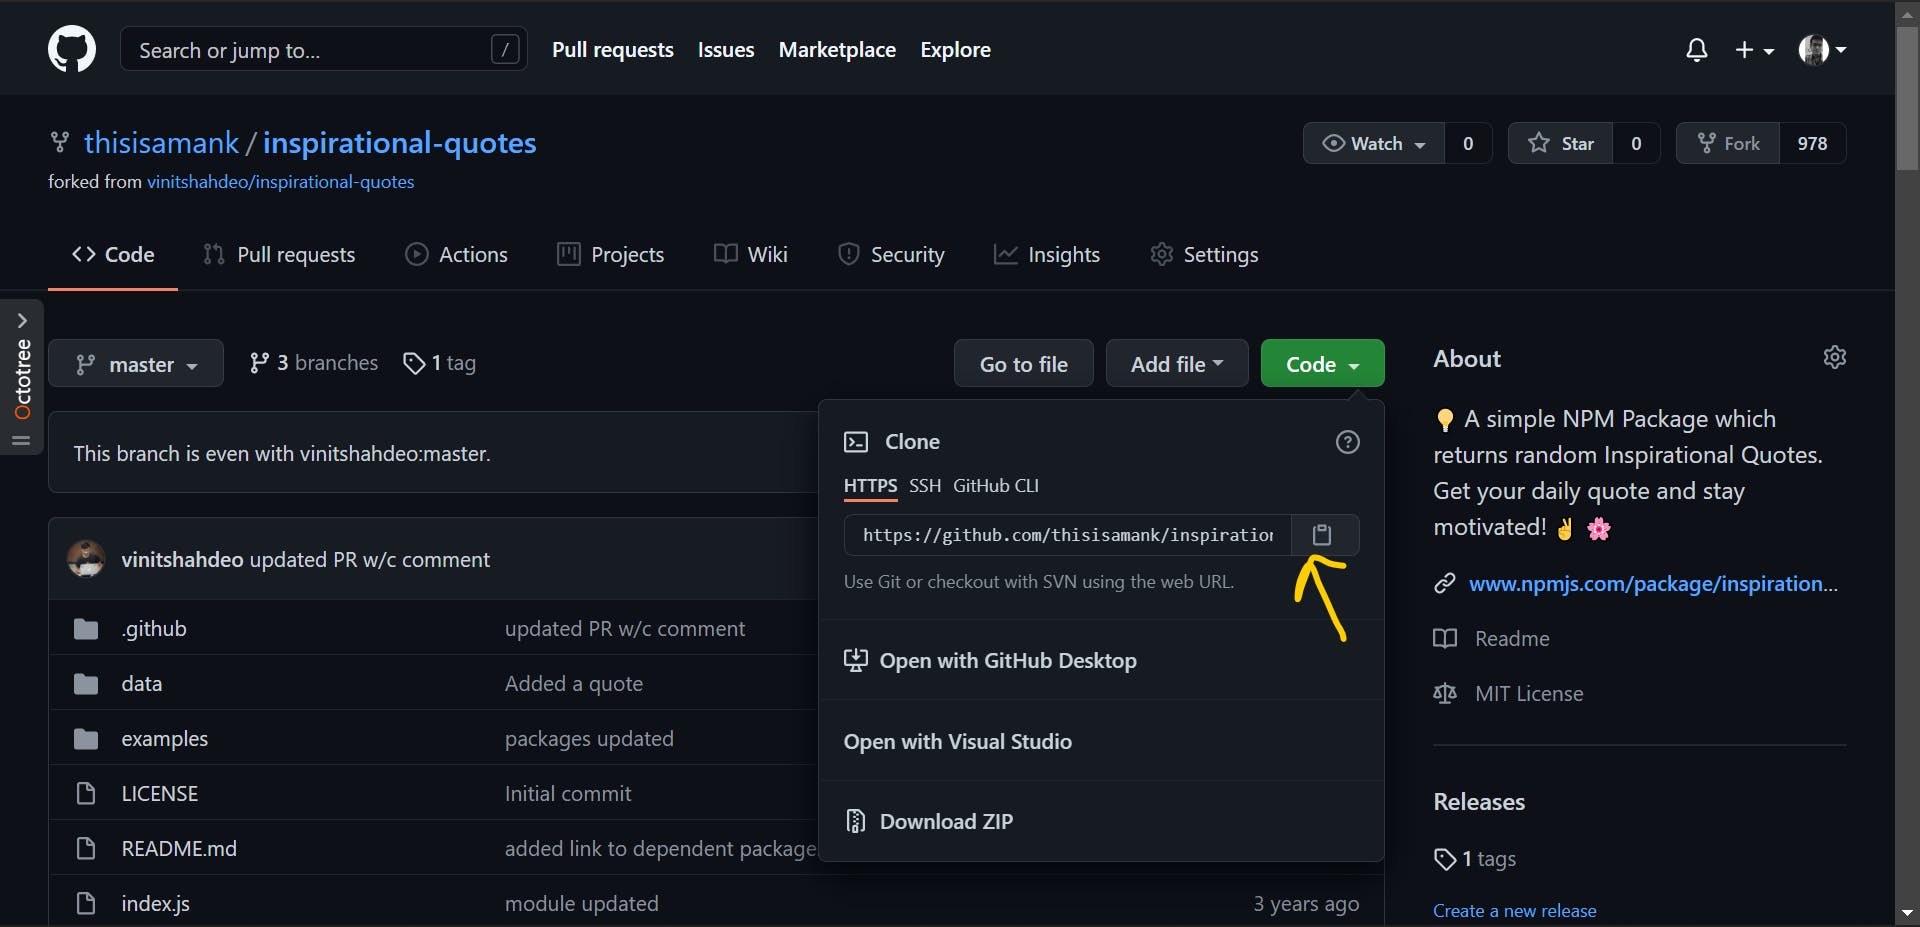
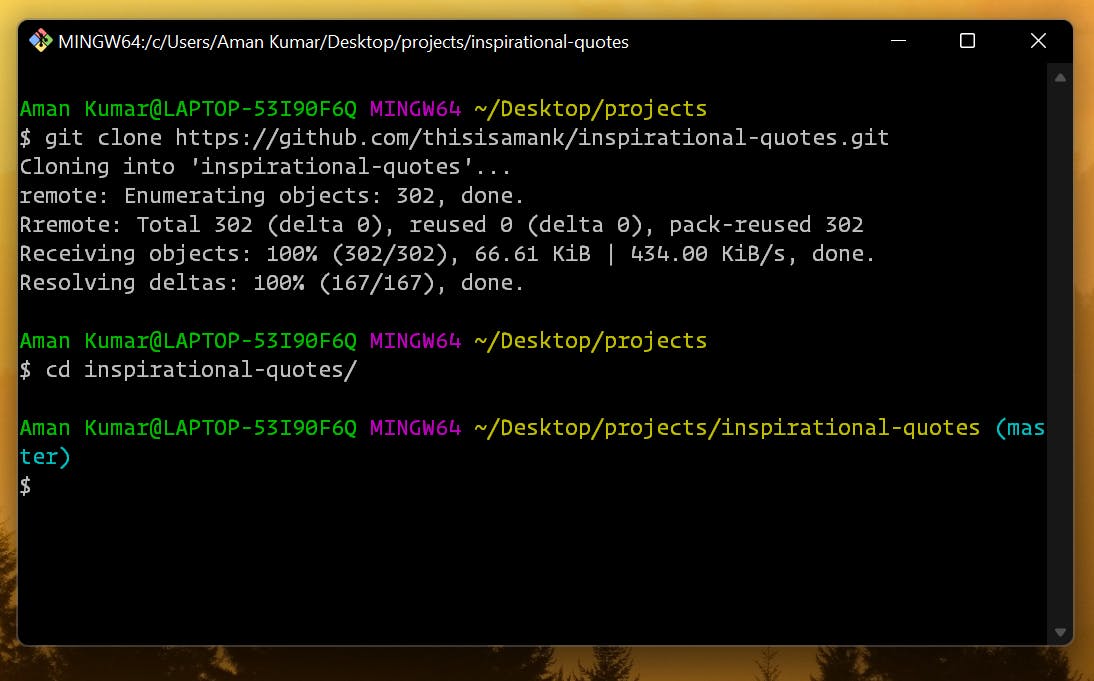
Here is the url. now we have to run git clone [https://github.com/thisisamank/inspirational-quotes.git](https://github.com/thisisamank/inspirational-quotes.git) to clone the repository to our local system. Once cloned move to the repository by cd inspirational-quotes.
now we can use any code editor to open this project, I will be using VS Code for this. So our issue is to add a quote to this repository. For this I will be adding my favourite quote of all time.
Nobody ever figures out what life is all about, and it doesn't matter. Explore the world. Nearly everything is really interesting if you go into it deeply enough. - Richard P. Feynman
Once we have made the changes we have to add this change to our staging area. Remember the git command for this? git add <file name> Then we have to commit these changes. So let's do it.
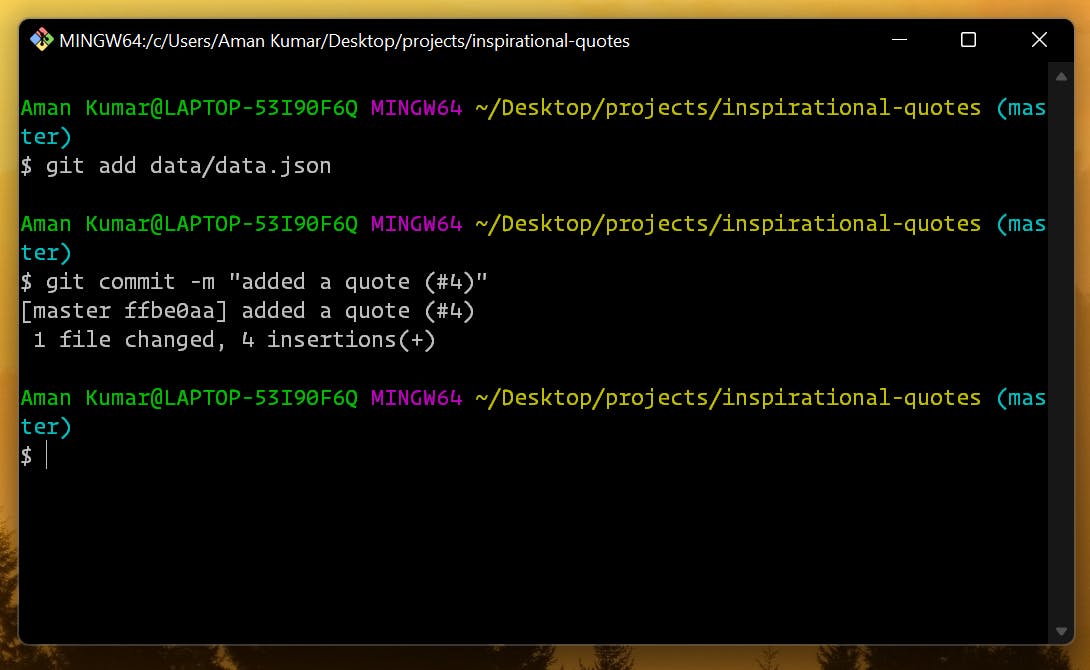
TIP: (#4) in the commit denotes issue number. By doing this in the commit message you automatically tag your commit to a particular issue.
once we have commited the changes now it's time to push our changes to our remote repository. (github repository). To do this we use git push command.

once pushed you can check your repository now. It will show that your repository is ahead by x commits which simply means that your commit is successfully pushed.
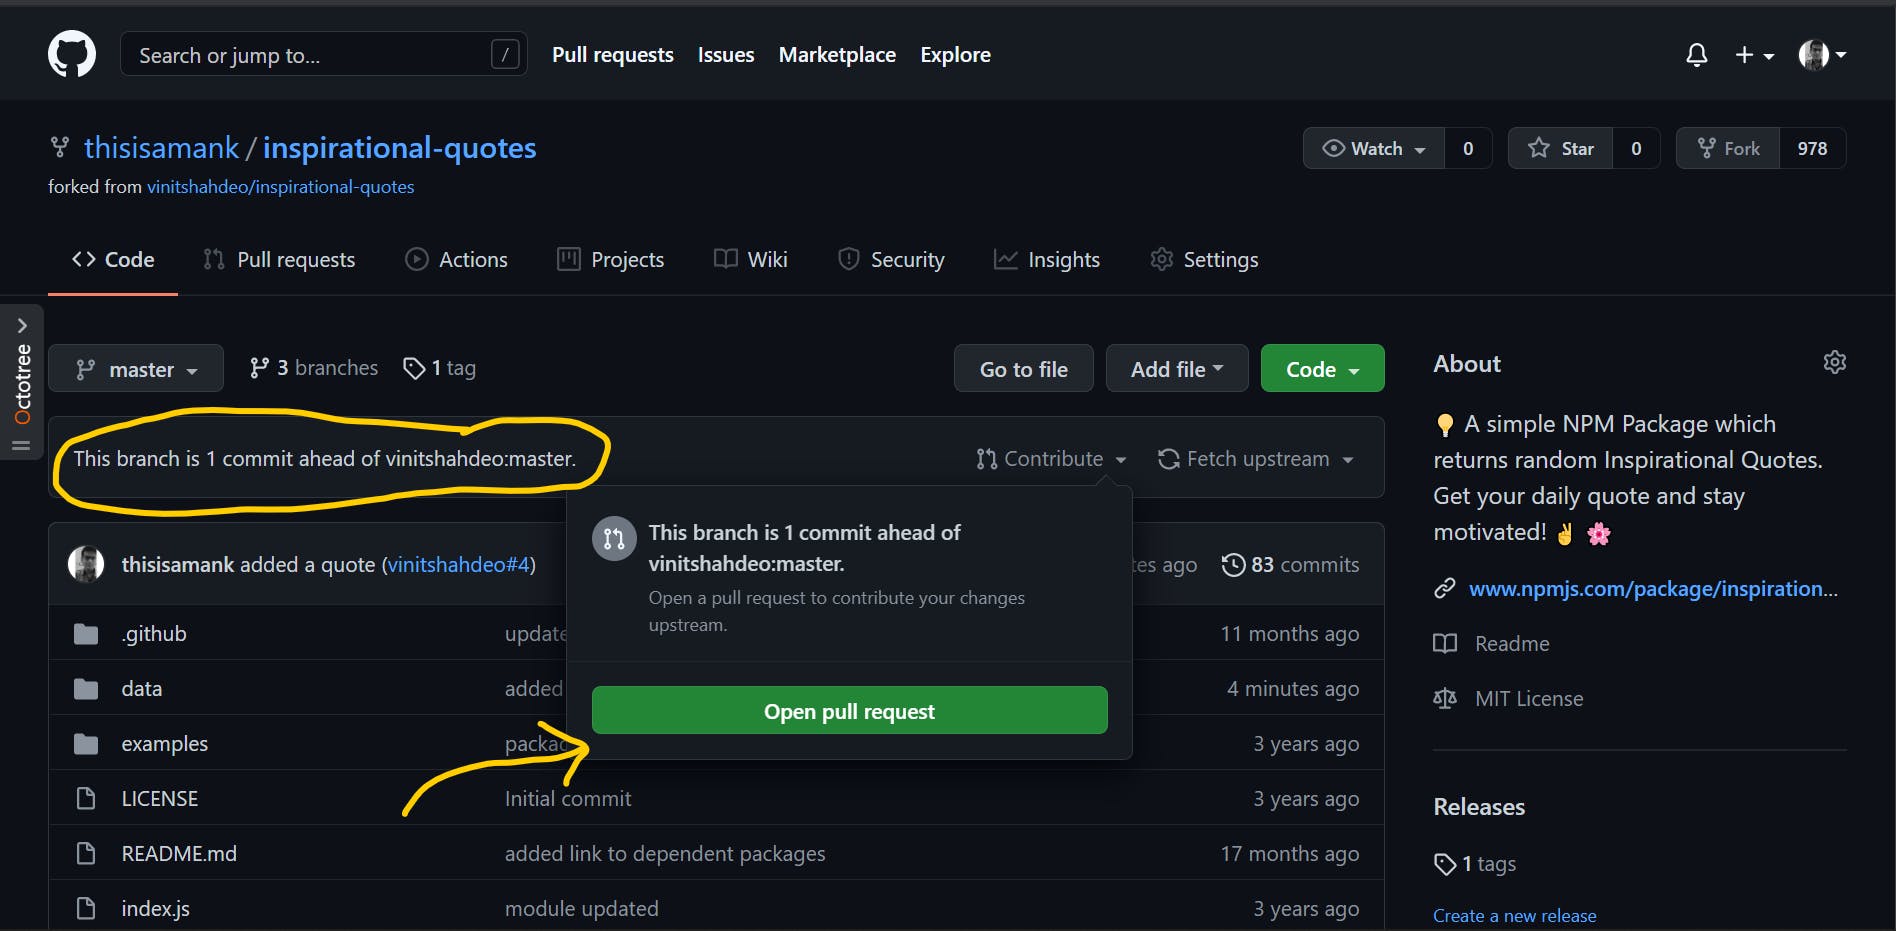 now on clicking on contribute button you can open a pull request.
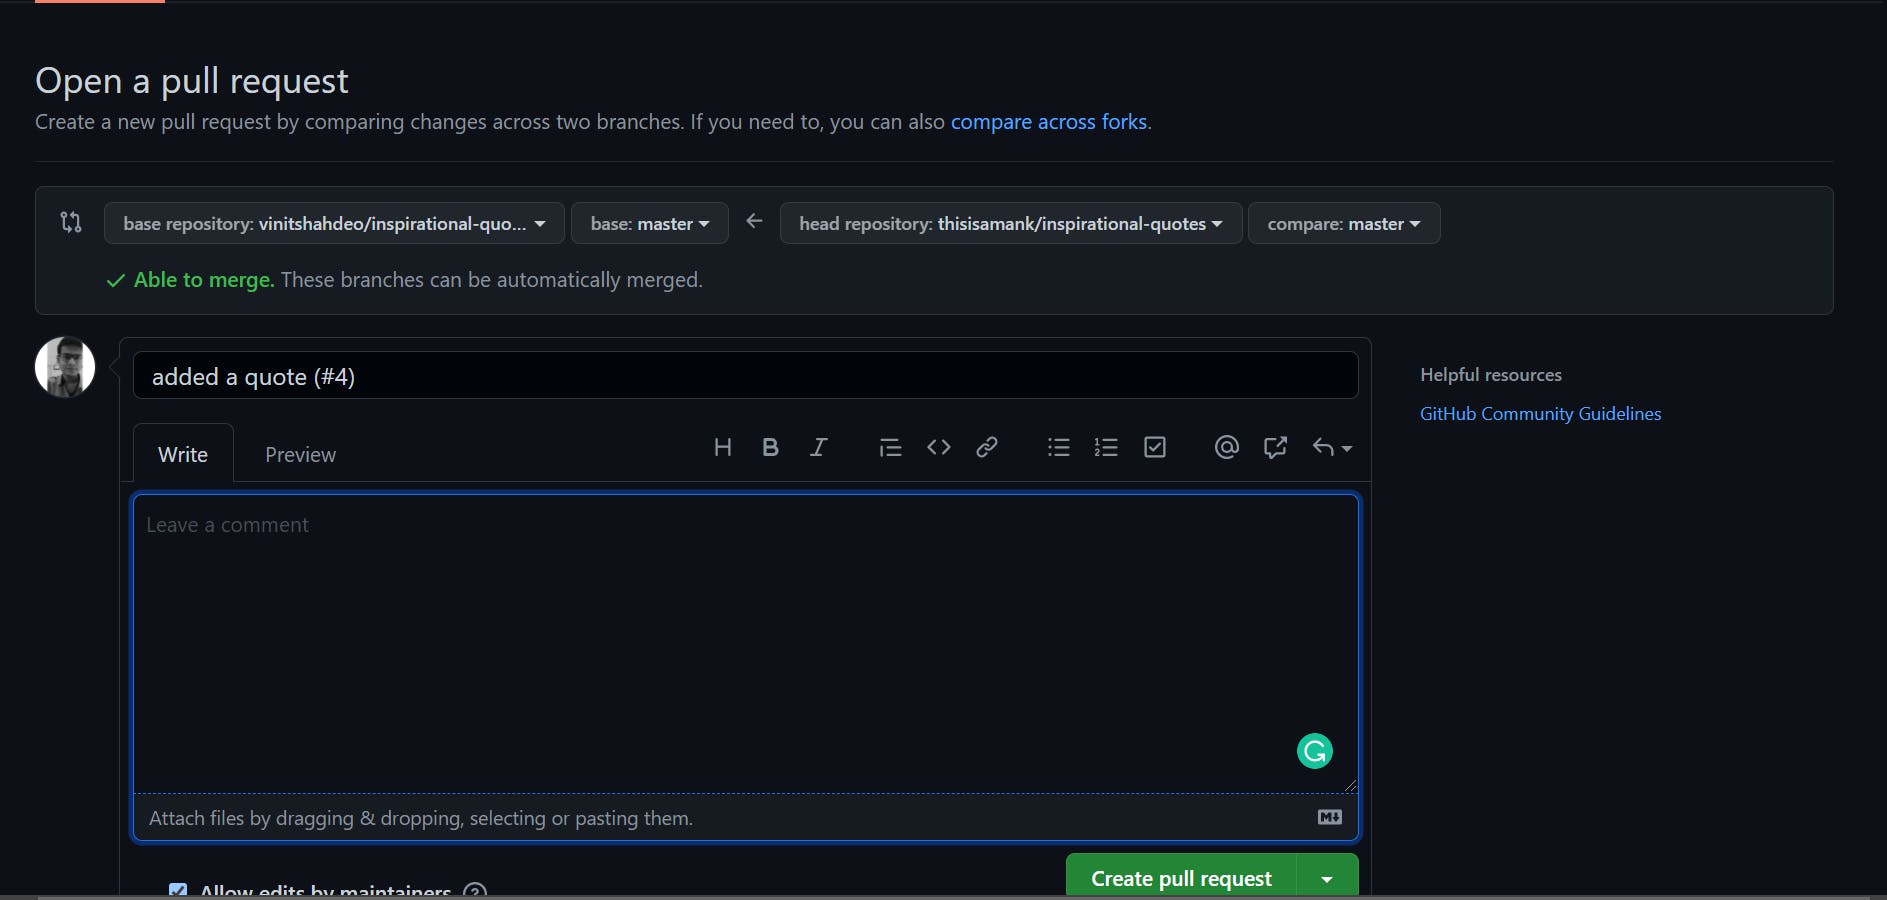 Once you have filled in this tap on
 Create pull request and you will do something like this.
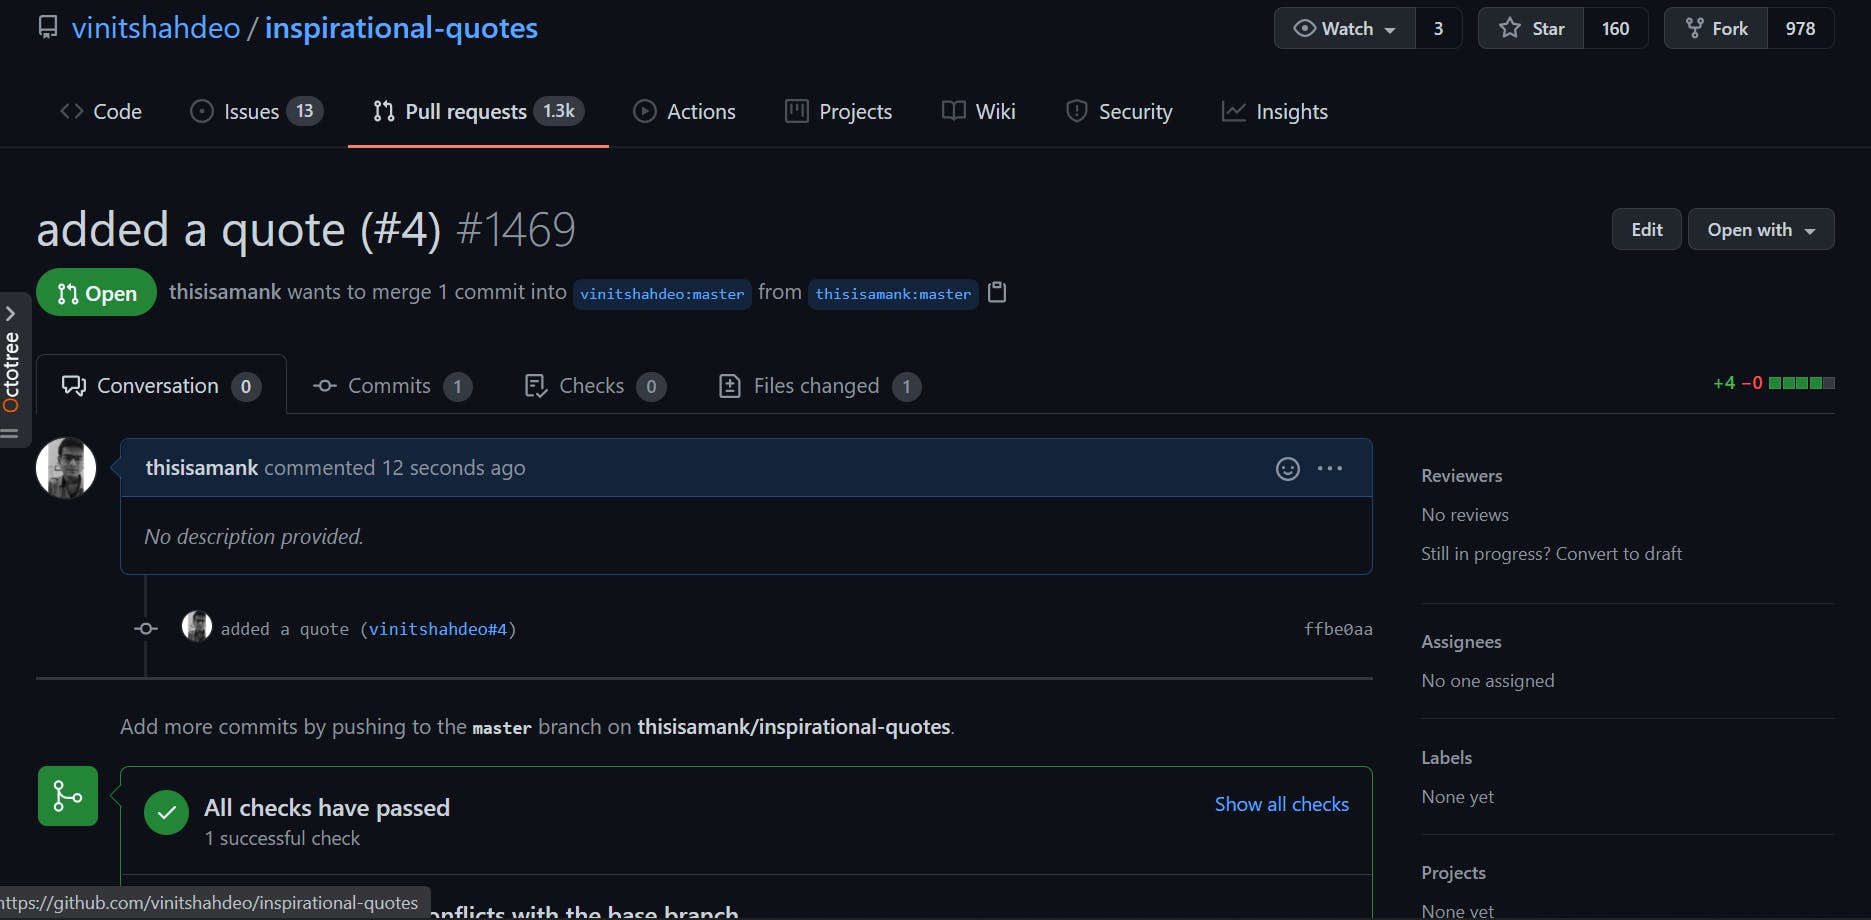
Now the project maintainer will review your PR. And voila! 🤩 You have done your first open-source contribution. Congratulations 🎉🎊.
I am really grateful to you for making me a part of your journey into open source. May the force be with you and you do a lot of good contributions in the open-source world.
If you enjoy this journey give me a clap and comment down your reviews. You can also follow me on twitter. Make sure you subscribe to the newsletter so that you don't miss future posts.